
Branding & Customization
The Branding Settings page covers two separate things: how your customer-facing pages look — the appointment scheduler, client portal, and inventory showcase — and how the CloudBridal app itself looks for your staff.
Logo
Upload your business logo to display across all public-facing pages. Transparent images (PNG) are recommended for best results. You can preview how the logo looks and remove it at any time.
App Appearance
Sets how CloudBridal looks for everyone at your shop. This is not customer-facing — your appointment scheduler, client portal, and inventory showcase keep your brand colors and customer-facing font.
- Theme: Default, Blush, Mocha, Sage, Dusk, or Plum. Hover a tile to preview it. This is your shop-wide choice; any staff member can pick a different theme for themselves on their Profile page.
- Font: The font CloudBridal uses on screen. Printed documents, PDFs, and anything a customer receives keep their own typography.
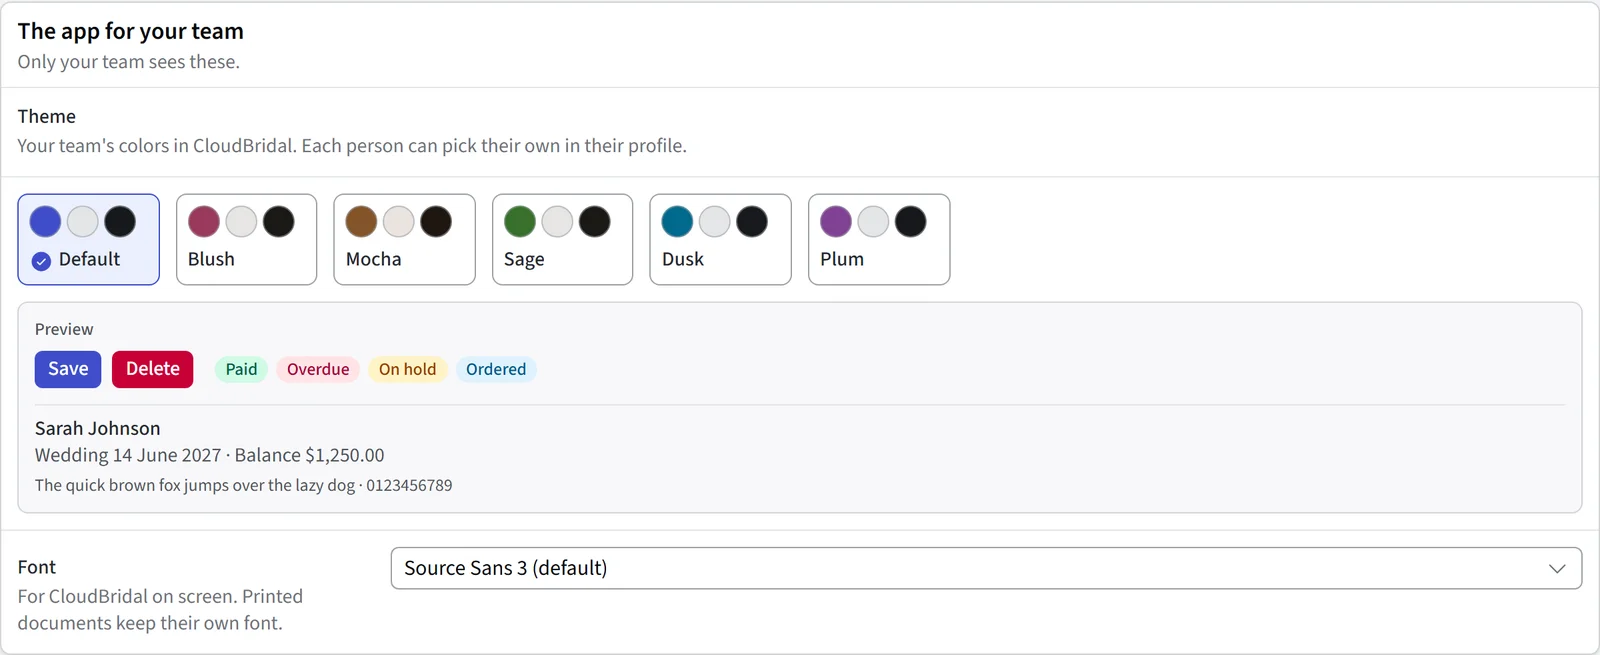
Until someone picks a theme, CloudBridal stays on Default. Theme selection needs a modern browser — on older ones the picker is replaced by a short explanation.
Brand Colors
Set your global brand colors to create a consistent look across all customer-facing areas:
- Primary Color: Used for buttons, links, and interactive elements
- Page Background Color: The background for all public pages
- Accent Color: Used for your business name and headings
- Navigation Bar Color: The background of the top navigation bar
These colors apply to both the appointment scheduler and client portal by default.
Customer-Facing Font
Choose a Google Font for your customer-facing pages, with a live preview so you can see your text before saving. Leave it blank to use the system default.
This is separate from the app font under App Appearance, which only affects the CloudBridal app your staff use.
Customer Emails
Your email design and signature live in Settings > Communications, and Branding links straight to them. The designs draw on the settings from this page — your logo, brand colors, and heading font — so a change here carries through to the emails your customers receive. See Email & SMS Communications for the designs themselves.
Per-Area Color Overrides
If you want the appointment scheduler or client portal to look different from your global brand colors, you can set per-area overrides:
- Appointment Scheduler: Override the primary button color, page background, and accent color
- Client portal: Override the button color, page background, and top navigation color
When an override is not set, the global brand color is used. Areas with active overrides display a "(has overrides)" indicator.
Updated on: 19/10/2026
Thank you!