
Documents & Agreements Setup
The Docs & agreements settings page sets up the documents you give customers, such as order summaries, sales agreements and pickup receipts, and how customers sign them.
Document Templates
CloudBridal starts you with several templates, such as a special order document and a pickup agreement. Each template is the starting point for a document in a particular situation. For example, when you sell a special-order gown you'll usually give a summary of the order with your terms of sale, and at pickup a document confirming the pickup with different terms.
To add your own:
- Go to the Docs & agreements settings page
- Click New document template, or open an existing template
- Choose Order document (a quote, order summary, pickup receipt or agreement for an order) or Favorite items pricing sheet (item details and prices for a customer's favorites). Most of the time you'll want an order document. See Quotes for pricing sheets
- Fill in the template's tabs:
- Contents: The template's Name, how Prices are shown (Before tax for regions like the US, Including tax for regions like the UK or Australia), what the document shows, and the Agreement printed after the orders
- Header and footer: The layout of the document header, the Document title, and header and footer text
- When it's used: The order type, order status, main item type and customer type the template is for. Leave any of them on "Any" to match all. For example, New orders usually get the initial receipt, and Completed orders the pickup document
- Signing (Ultimate): Signature acknowledgments (see below)
Click Preview at any time to see the printed layout with sample data, including your unsaved changes.
Document Title
The Document title is printed at the very top of the document so customers know what they're looking at, such as "Sales receipt" or "Pickup acknowledgment". It's also the document's name in the customer's list of documents, in the client portal and when they sign.
Signing on Paper
To have customers sign a printed copy, turn on Print lines for signing on paper on the template's Contents tab. It adds blank signature and date lines. Electronic signatures are added either way.
Agreements
Agreements are the terms printed with an order document. Create one with New agreement, then choose it as the Agreement on the document templates that should include it. Turn off Include it by default if staff should add it only when needed.
An agreement with no wording yet is left out of documents and shared quotes. CloudBridal shows This agreement hasn't been set up yet on the template and when you make a document or share a quote, with a Set up agreement button for adding your shop's wording.
Document Generation
Once your templates are set up, you can generate documents:
- Order document: From the customer's profile, click New document in the Documents card, or in the order's menu in the Orders card. The customer needs at least one order.
- Pricing sheet: From the customer's Favorite items tab, add one or more items and click Pricing sheet. This is an informal price list with no commitment. For a quote the customer can sign and accept from the client portal, see Quotes.
Document Saving and Signing
Documents can be:
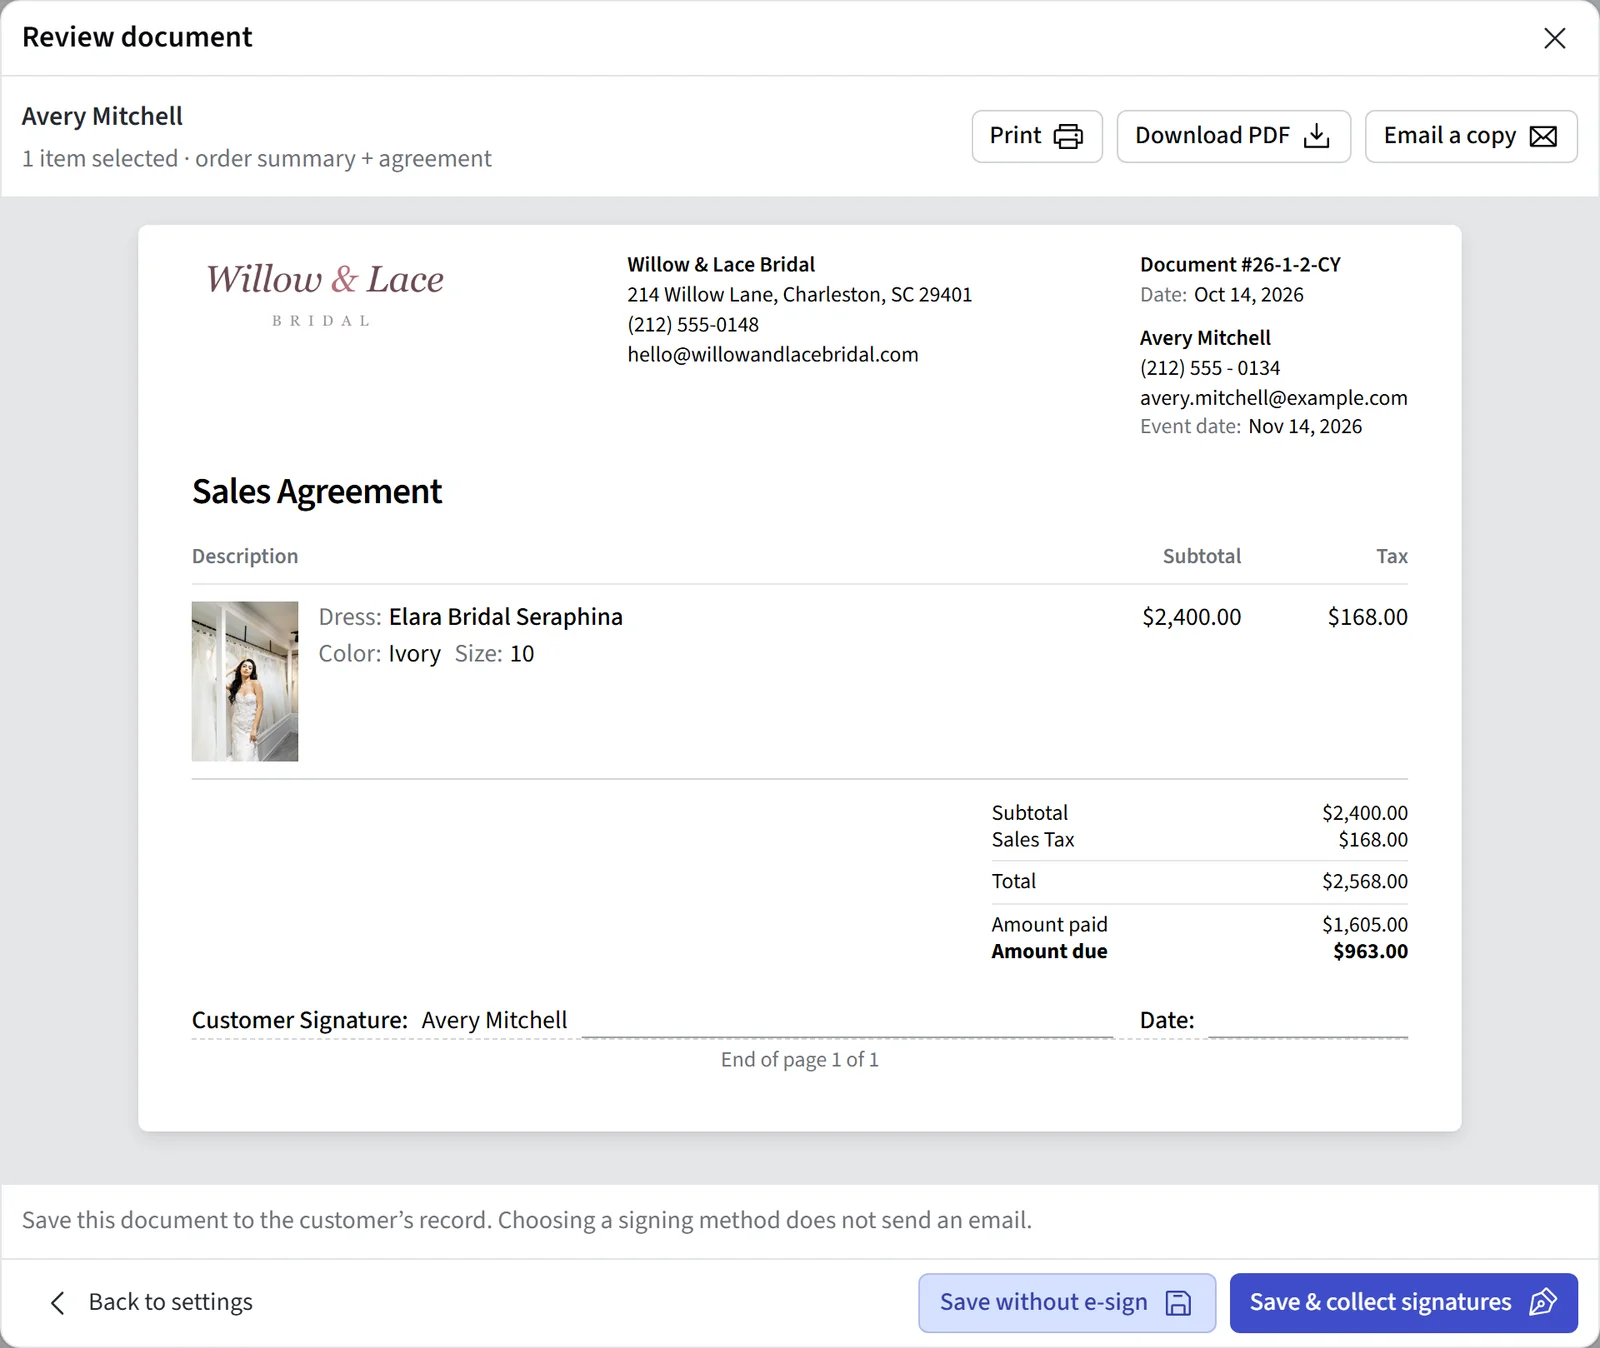
- Saved to the customer profile, without a signature. This keeps a copy of the document as it was at that point.
- Signed electronically, in person or remotely. Requires Ultimate Plan.
- Printed, by clicking the print button after generating the document.
Ways to Sign
Start from the customer's saved document and choose how they'll sign:
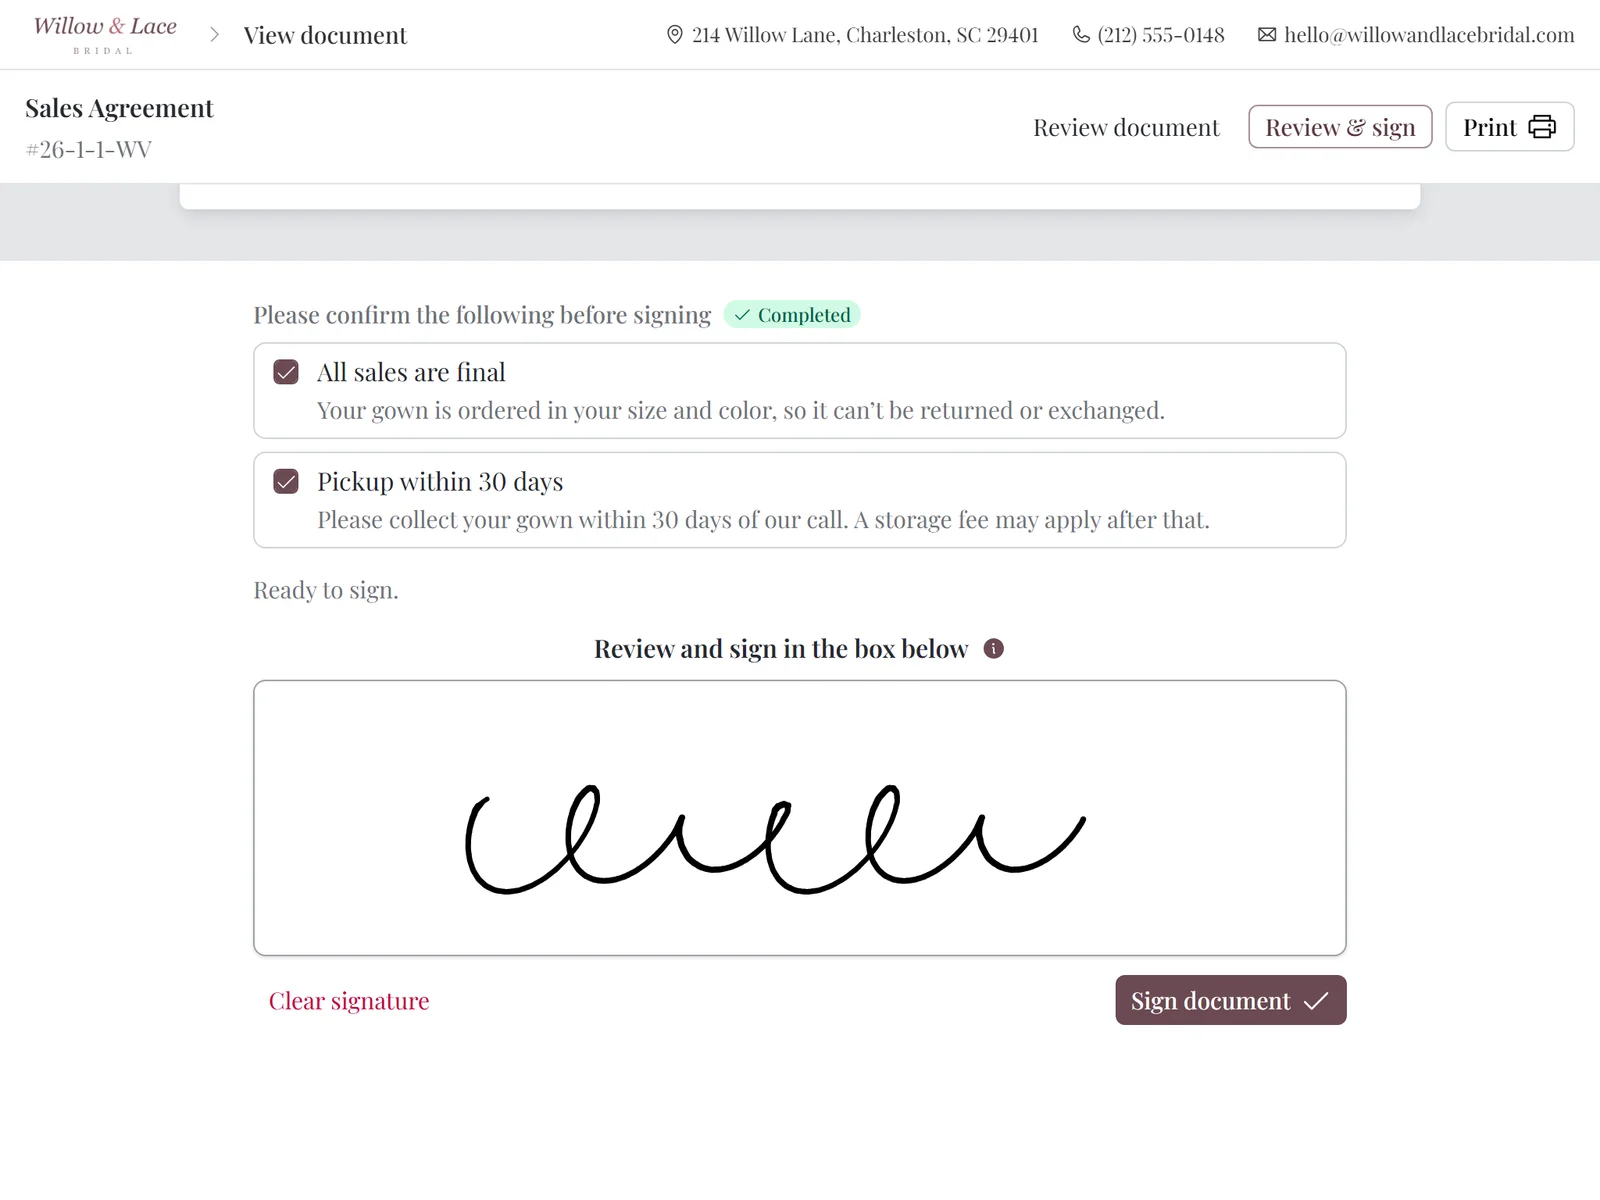
- In store: Click Review & sign to open the full document on your device. The customer signs on this device's screen, or on your Stripe card reader, which shows the document's acknowledgments and captures the signature. A signature-capable reader that's offline shows as a disabled option with the reason.
- Email: Send a signing link by email. You can change the subject and body for this send.
- Link: Copy a direct signing link to share another way.
The customer's signing page walks them through each section and acknowledgment and ends on Document signed. Once signed, documents are archived as PDFs, so an executed document's layout never changes.
Signing Settings
The Signing card on the Docs & agreements settings page covers:
- Ways customers sign and Card readers: How customers can sign, including on a Stripe card reader (which needs Stripe payments on)
- Ask for a staff signature too: Documents saved from then on ask a staff member to sign as well as the customer
- Customer signature label and Staff signature label: The text printed under each signature. They default to "Customer signature" and "Staff signature"
Each document keeps the labels that were set when it was created, so changing them later doesn't change existing documents.
Signature Acknowledgments
Plan Requirement: Ultimate
Acknowledgments are short points the customer must accept one by one before signing, e.g. "All sales are final." To set them up:
- Go to the Docs & agreements settings page
- Open a document template and go to the Signing tab
- Click Add acknowledgment and enter a short Title, plus optional details shown under it (up to 3 per template)
Customers must accept every acknowledgment before they can sign: in store, through an email or direct link, in the client portal, and on card readers. Accepted acknowledgments are printed beside the signature. Acknowledgments attach when a document is generated, so editing the template later doesn't change documents that already exist.
Customizing Document Emails
The emails that send documents, Document email and Signature request email, are edited in Communications. To change them for one template, open the template and click the email's button in the Emails card on the Contents tab. Use smart fields such as the customer's name to personalize them, for example a warm message for a new order receipt and a simple confirmation for a pickup document.
Document Viewer & Audit Trail
Open any saved document from the customer's profile to review it. The viewer shows:
- Status badge: Signed (with the signing date), Pending signature, Rejected, or Withdrawn (the signature request was withdrawn because a quote was converted to an order, or an order back to a quote)
- Audit trail: Key document events — creation, sending, first view, and signing — with timestamps and the signing channel (in store, email, direct link, or card reader). You can print the summary or download it as a PDF.
- Send for Signature: Send an unsigned document for signature straight from the viewer.
The audit trail helps you follow up with customers who have received but not yet signed their documents.
Payment Receipts
Payments show on order documents, but you can also print a payment receipt on its own. This is handy when the customer makes a new payment and you'd rather not reprint the whole order summary.
Updated on: 19/10/2026
Thank you!