
Purchase Orders
Plan Requirement: Core or Ultimate
Purchase orders (POs) track what you've ordered from your vendors until it arrives.
Types of Purchase Orders
- Customer purchase orders: For one or more customer special orders. The PO moves its orders along with it: when the PO is scheduled, sent or received, the linked orders follow.
- Stock purchase orders: For new or existing inventory.
Creating a Purchase Order
- Go to the Purchase orders page
- Click New purchase order and choose Customer purchase order or Stock purchase order
- For a customer PO, pick a vendor to load all of that vendor's new customer orders, or search by customer. Then tick the orders to include
- For a stock PO, pick the vendor and add the items you're ordering
- Fill in the status, notes, cost and any other details, then save
You can also start a customer PO from the order itself with Create PO.
Customer PO lines show the item's photo. Use Check size chart beside a size to compare the customer's measurements with the vendor's chart before ordering.
Entering Stock PO Line Items
Line items are grouped into a table per item type. For each line:
- The size or name column follows the item type: sizes for size-tracked types (e.g. dresses), names for everything else.
- If the item has varieties, a Variety dropdown appears before the size column. Picking a variety makes the size/name optional.
- When the variety has a wholesale price, a Variety price button beside the unit cost fills the cost in one click.
When you save, CloudBridal checks that each line is complete and still matches the vendor's inventory, and says what needs fixing.
Receiving Items
Once the PO has been ordered, click Receive beside each line as it arrives. Receiving moves the PO's status for you:
- The first line received moves the PO to Partially arrived
- The last line received moves it to Arrived
On a stock PO, receiving a line creates or updates the inventory item for you. You still need to add details such as the retail price. After receiving, the label printing dialog lists only the items you received, so you can label them straight away.
On a customer PO, receiving an order marks it Arrived on the arrival date you pick.
How Customer Orders Follow Their PO
Until an order arrives, its PO moves it:
- On the order, Scheduled and Ordered show as Set by PO #n. They change when the PO is scheduled or sent, not by hand.
- If an item arrives early, move the order to Arrived from its status menu. When the PO is already out with the vendor, CloudBridal offers Receive it on PO #n too, so the PO stays in step.
Purchase Order Statuses
- Draft: You're still putting the order together.
- Scheduled: Sent to the vendor but not yet confirmed. Optional: turn on Add a Scheduled step before Ordered in Orders settings.
- Ordered: Placed with the vendor.
- Ready to ship and Shipped: Optional steps while the vendor prepares and ships the order.
- Partially arrived: Some lines have been received.
- Arrived: Everything has been received.
- Cancelled: The order has been cancelled.
Printing and Sending Purchase Orders
From a saved PO:
- Print: Your own copy. Use Include cost summary and, on customer POs, Include customer measurements to choose what it shows.
- Send to vendor: Emails the PO to the vendor. You can edit the message and choose whether to include costs and measurements before sending.
Viewing Purchase Orders
- Purchase orders page: Orders are grouped by status
- Customer order: Click View PO on the order
- Vendors list: choose View purchase order history in the vendor's row menu
- Inventory item: Click Purchase orders on the item's details page
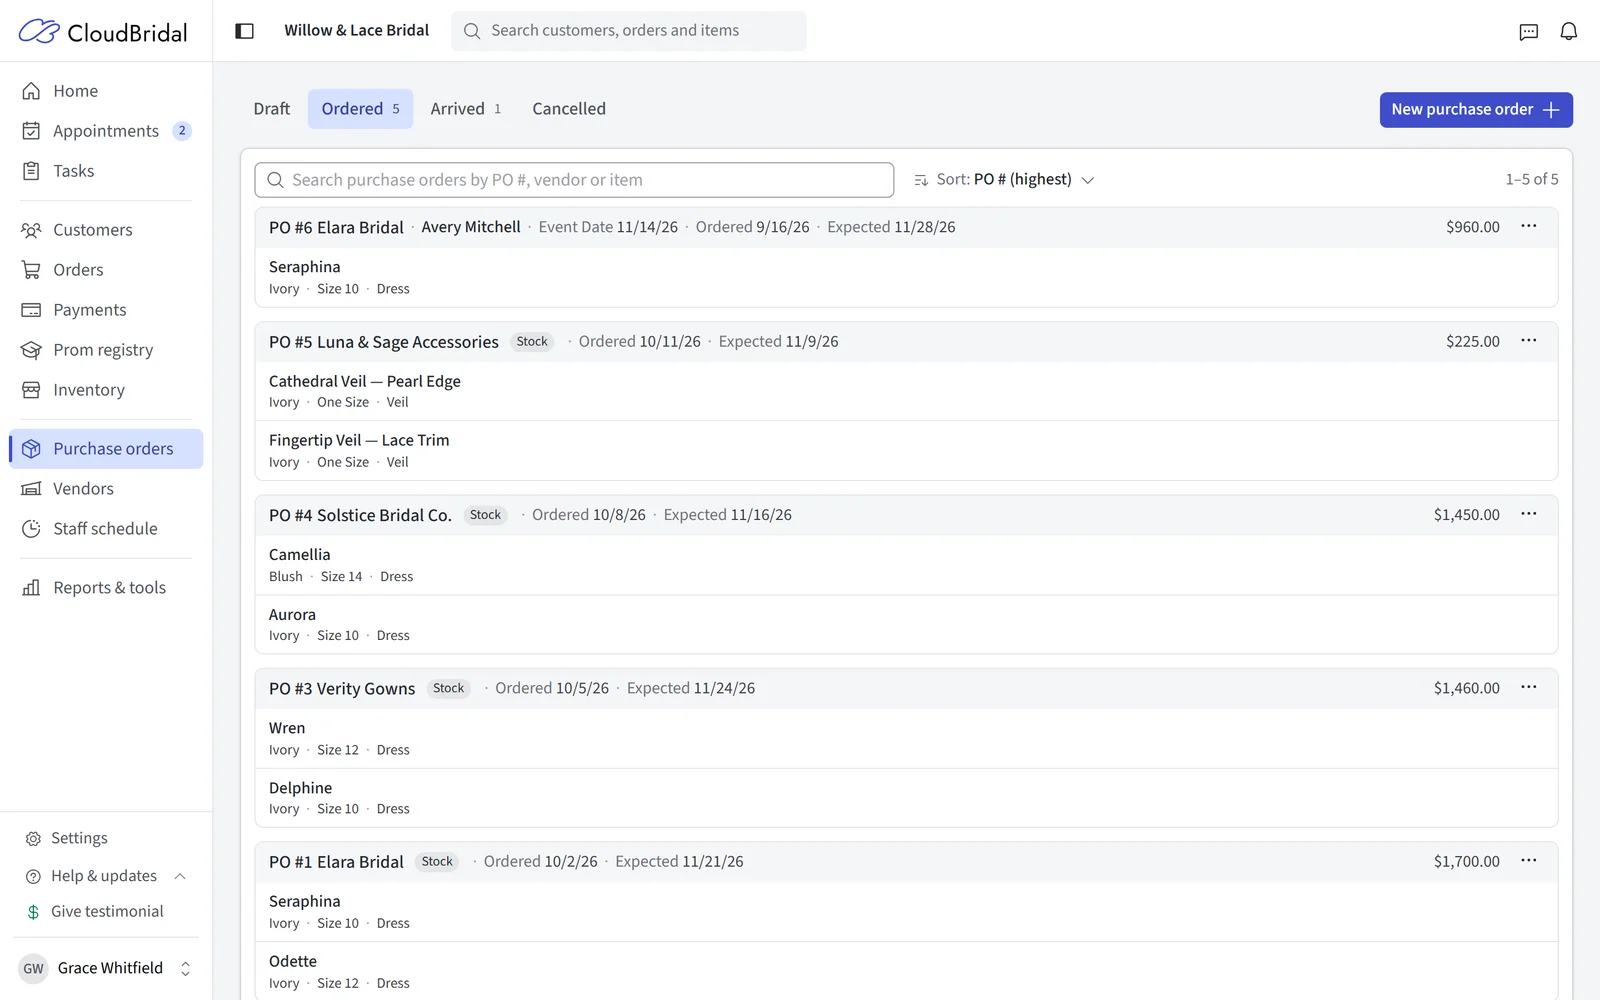
Searching Purchase Orders
Search by PO number, reference number, vendor, custom field, or the name of an item on the order. The count beside each status shows where the matching orders are.
Purchase Order Settings
Purchase order settings are on the Vendors settings page:
- Use purchase orders: Turn it off if you don't order through POs. Every purchase order screen is hidden, and staff move special orders through their statuses by hand. Nothing is deleted, so turning it back on brings everything back.
- Purchasing email: The address vendors see on POs and reply to. Leave it empty to use your shop email.
- What vendors see: Extra details on the POs you send, such as the customer name, your event date field, measurements, and order or purchase order fields. Staff can still choose whether to include measurements each time.
- Purchase order fields: Your own fields for customer POs. See Custom Fields.
The wording of the email sent to vendors is set in Communications.
Updated on: 19/10/2026
Thank you!