
Inventory Showcase
Plan Requirement: Ultimate
The Inventory Showcase is your boutique's digital window display—an interactive gallery that lets clients browse your collection from anywhere. Whether they're dreaming about their perfect dress or preparing for an appointment, the showcase makes it easy for them to explore what you offer, favorite their top picks, and get inspired before stepping into your store.
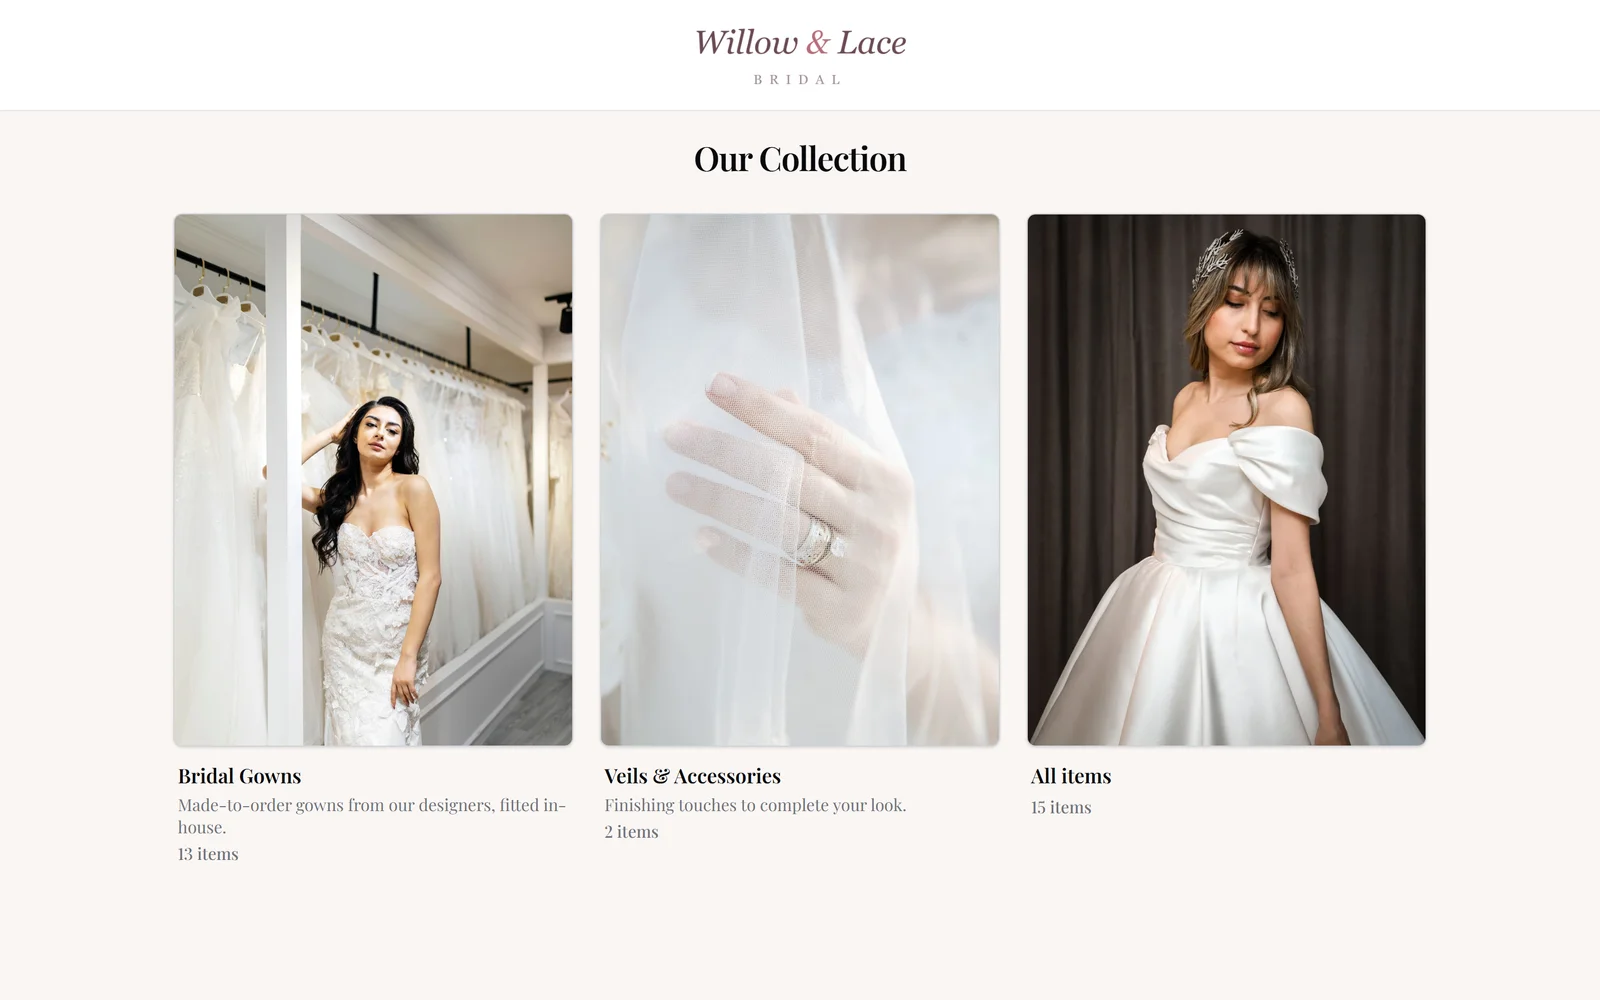
How Clients Use the Showcase
Clients browse a gallery they can filter and sort, then open any item for a full product page with a larger image gallery, style details, and your description. As they browse they can favorite items, and when they're ready they can request an appointment right from the showcase. Favorites reach a client's profile once you know who they are—see When Favorites Reach the Customer Profile below.
You control whether pricing appears—and when an in-stock item is priced below its made-to-order price, both are shown so clients can see the savings on off-the-rack pieces.
Enabling and Customizing the Showcase
Head to Settings › Inventory showcase and turn on Publish the inventory showcase. Four tabs then shape the experience, and Preview showcase opens it as clients see it:
- General — the Showcase name clients see, letting customers sort by best sellers, the appointment booking and "Email us" buttons, whether discontinued items with remaining stock appear, and your showcase links and embed code
- Item display — the Name under each photo (designer and item name, item name only, or none), item details such as fabric and silhouette, every photo or just the featured one, what's in stock (made-to-order and in-store prices, colors, sizes), Price names, and a Note on every item page. A preview shows the gallery and an item page.
- Collections — curated groups that split the showcase into browsable sections (see below)
- Filters & visibility — which filters clients get, which designers, styles and item types the showcase includes, and which customer categories clients can shop for
Collections
Collections let you curate the showcase into groups like "Wedding Gowns" or "Sample Sale." Each collection is a saved filter (customer category, item types, tags, vendors/designers, silhouettes) with its own title, description, and tile image—set them up on the Collections tab of your Inventory showcase settings.
Once you have at least one collection, the showcase opens on a landing page of collection tiles, each showing its image and a live item count, plus a built-in All Items tile that keeps the rest of your inventory browsable. Clients click a tile to browse that collection.
Each collection can also have:
- Pinned items, which appear first when clients browse the collection
- Also show for these items, which reveals prices, colors or sizes for the collection's items even when the rest of the showcase hides them—useful for sample sales. These only ever reveal more; they never hide details you already show.
Filters and Curation
The Filters & visibility tab controls how clients narrow down your collection.
Filters — turn on the ones clients can use: designer, silhouette, fabric type, neckline, embellishment, item type and tag. The values come from what's already set on your inventory items. For tags, choose which ones clients can filter by.
What the showcase includes — for Designers, Silhouettes, Fabric types, Necklines, Embellishments and Item types, every value shows by default. Open one to tick only the values you offer; its row then reads Hiding N of M. This applies whether or not the matching filter is on, and items with only hidden values drop out of the showcase entirely. Items with no silhouette, fabric type, neckline or embellishment set are unaffected. Hiding a designer also hides items with no designer.
Who customers shop for — the customer categories clients can switch between, and which one the showcase opens on.
Turn on Let customers search by name to add a search box. It's available only while a name shows under each photo (on Item display), and designer names only match while designer names are shown.
Browsing, Filtering, and Sorting
Clients can mix and match filters to narrow the collection; the filters they apply are clearly displayed and can be removed with a click. They can also sort the results—by featured, new arrivals, best sellers, name, and price.
Price: Low to High and Price: High to Low only appear where prices are actually shown, either globally or through a collection's price override, and items without a visible price sort last.
The URL updates automatically as filters are applied, making it easy to share a specific view with a client or feature a collection on your website or social media.
Item Pages
Clicking an item opens its full product page:
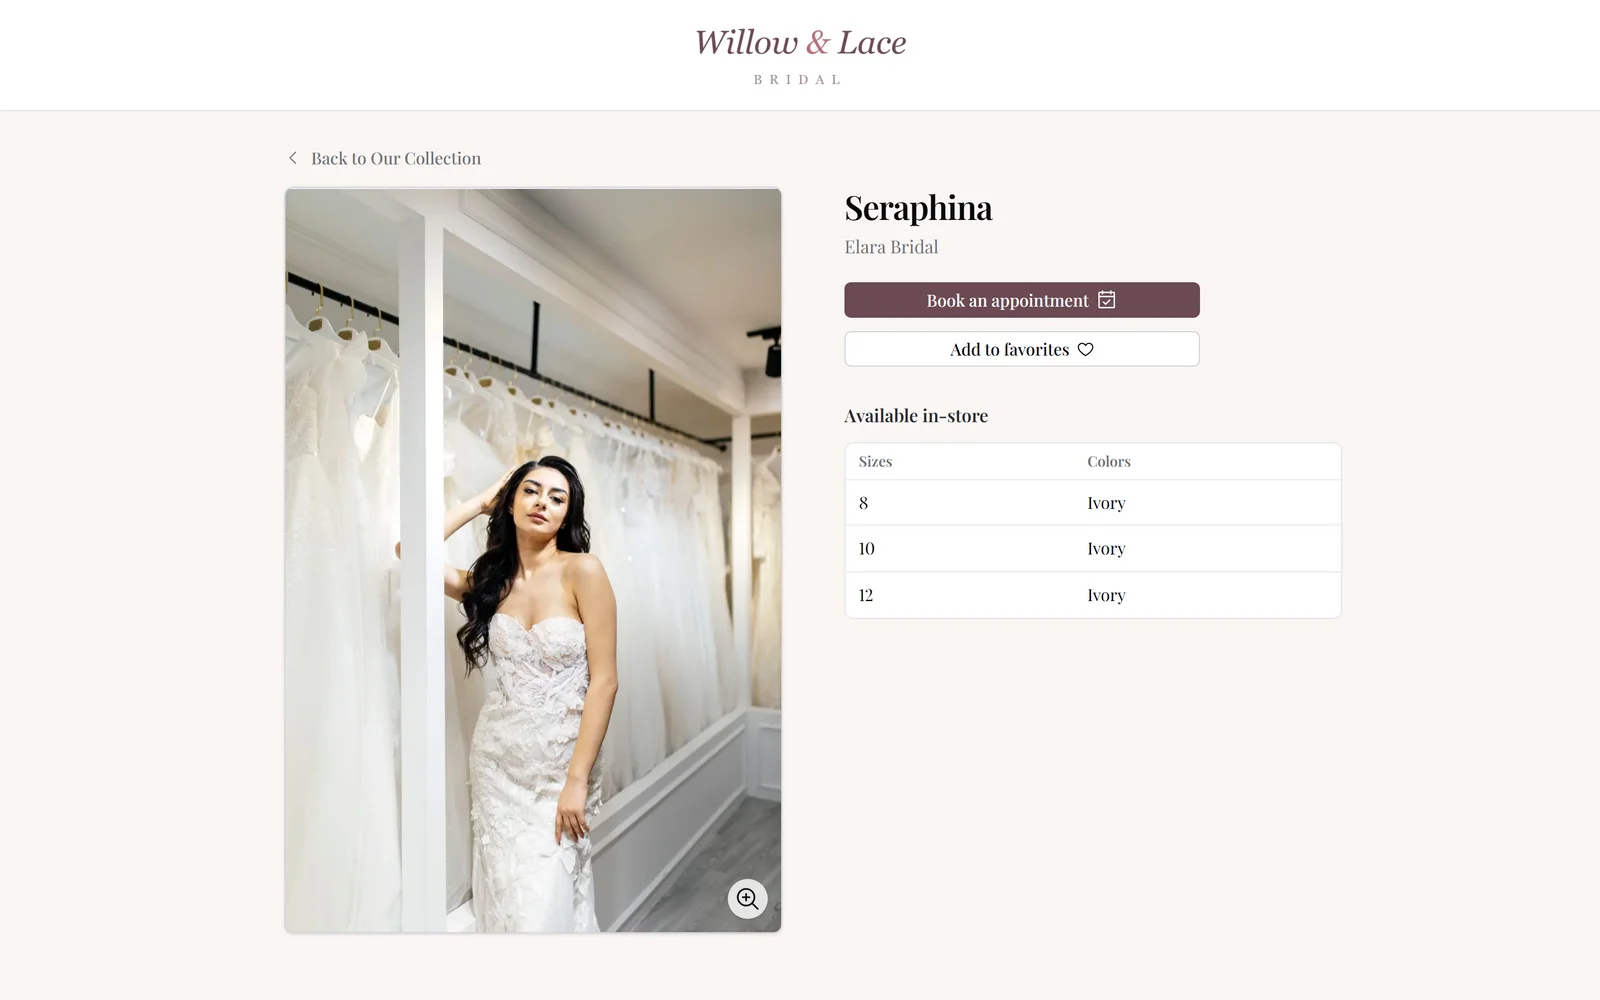
- Photos — thumbnails sit beside the main image on larger screens and below it on phones, starting with the featured image. Clicking a photo opens it full screen at full quality, already magnified where the client clicked. Moving the pointer pans around, clicking again drops back to the whole photo, and the arrow keys step through the other photos while staying zoomed. Esc or a click outside closes it.
- Book an Appointment — shown while Let customers book an appointment from the showcase is on, and hidden once the visitor has booked.
- Email Us About This Item — off by default. Turn on Show an Email us button on item pages on the General tab and clients get a button that opens an email to your Shop email (set in Settings › General) with a link to the item.
Clients who arrive through the client portal see neither button—they book and message you through the portal instead.
Sharing a Single Item
Every saved inventory item has its own short public link, handy for texting a client or posting to social media. Open the item, go to its Showcase tab, and copy the Share link—they look like go.cloudbridal.com/i/aB3xY9kQ2p.
If the item isn't currently visible in the showcase—it's hidden, missing an image, excluded by your settings, or the showcase is switched off—the field warns you that the link will show "Item Not Found".
Favorites and Appointment Requests
Favoriting is at the heart of the Inventory Showcase. Clients can click the heart icon on any item to add it to their favorites, and a prompt appears offering to book an appointment—which is what carries the list over to you. When ready, clients can request an appointment directly from the showcase, making it easy to turn inspiration into action.
When Favorites Reach the Customer Profile
A client browsing your public showcase is anonymous—the showcase has no way to know who they are, so their favorites start out saved only in the browser they're using. There are two ways they reach a customer profile:
- Through the client portal (recommended). A client who opens the showcase from their portal is already identified, so favorites save to their profile as they tap, and keep syncing on every later visit. This is why we recommend the portal as the main way clients reach your showcase.
- By booking a first-time appointment from the showcase. The list they built travels with the appointment request and lands on the profile created for them. Favorites they add afterwards keep syncing too.
If a client browses anonymously and never books or uses their portal, their favorites stay on their own device. You won't see them, and that's expected rather than a fault.
Booking a follow-up appointment doesn't transfer favorites. Follow-ups are for clients you already have on file, so the showcase leaves their existing favorites—both yours and theirs—untouched rather than replacing them from a browser list.
Viewing Favorites in the Customer Profile
Once favorites reach a profile, they appear in its Favorite Items section. Here, your staff can see which items were selected by the client online ("Showcase Favorites") and which were added in-store ("In-Store Favorites"). This distinction helps your team prepare for appointments and personalize the experience—ensuring the right dresses are ready and the client's preferences are front and center.
You can also add or remove favorites directly from the profile, and even generate quotes for selected items. This seamless integration between the showcase and the customer profile makes it easy to keep everyone on the same page, from first browse to final fitting.
Managing Your Inventory
You have full control over what appears in the showcase. In your inventory system, you can:
- Add multiple images to each item (front, back, details, etc.)
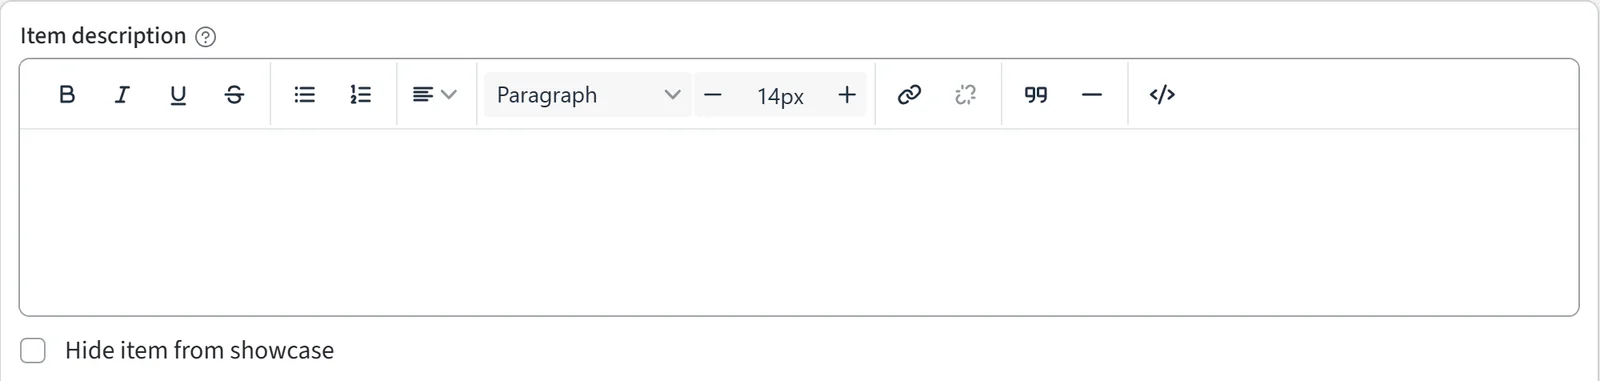
- Write an Item description on each item's Showcase tab
- Tag items for better organization and filtering
- Hide specific items by checking the Hide item from showcase box
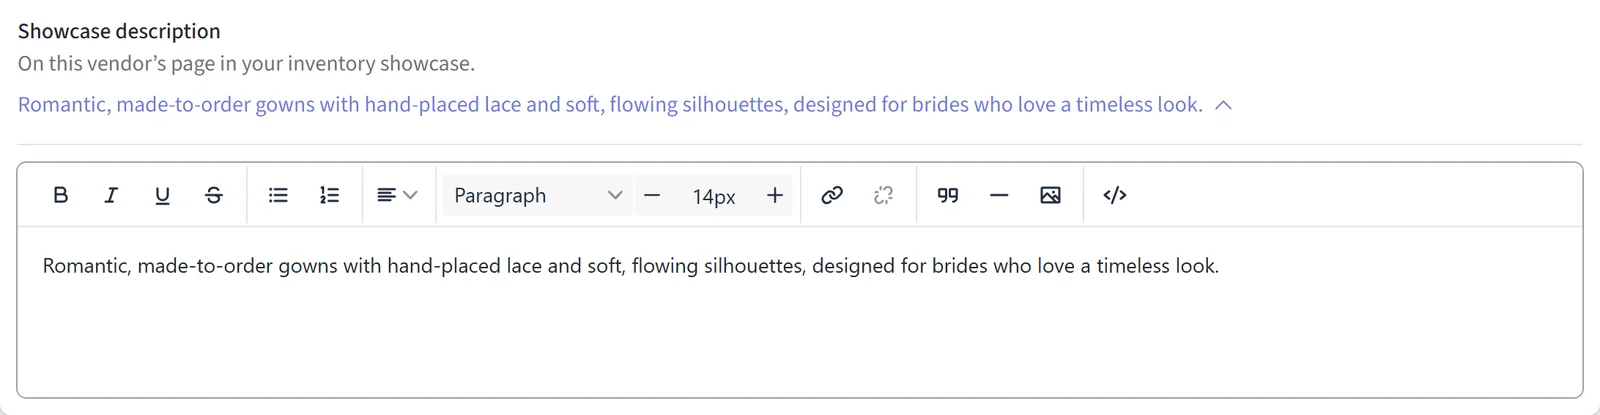
Each vendor can also have a Showcase description, shown on that designer's page in the showcase:
Multilingual Support
The Inventory Showcase supports multiple languages, including English, Spanish, French, German, Czech, and Norwegian. The language your clients see is your Language for customers, under Region & language in Settings › General.
Sharing the Showcase
Everything you need is in the Showcase links section on the General tab of your Inventory showcase settings:
- Your showcase page — one link that opens the showcase as its own page, ready for your website menu, buttons, or social bios
- Send each customer their own link — add the inventory showcase link smart field to a customer email or text, and anything they favorite through it is saved to their profile
- A link for each collection — one copyable link per collection, each opening the showcase already inside it. Appears once you have at least one collection.
- On your website — embed code for your own site (see below)
You can also include the showcase in the client portal, which is highly recommended for a more consistent favoriting experience ✅.
Embedding the Showcase on Your Website
Embedding puts the showcase directly on your own page, and if you have collections, the Embed code for dropdown builds code for the whole showcase or for one collection only—so a Sample Sale page can embed just that collection. For the two embed options, website-builder caveats, and step-by-step instructions, see Embedding CloudBridal on Your Website.
Client Portal Integration
If you use the Client Portal, the Inventory Showcase is automatically available to clients there. This seamless integration means clients can browse, favorite, and prepare for their appointment all in one place. Turn it on or off with Let customers browse the inventory showcase in Settings › Client portal.
Best Practices
- Use high-quality, multiple images to showcase each item's details
- Write clear, inviting descriptions to help clients fall in love with your collection
- Organize with meaningful tags and keep your inventory up to date
- Test the showcase on different devices to ensure a great experience everywhere
FAQs
Why aren't some of my items showing up?
Check that the item isn't hidden or discontinued, and that it has at least one image uploaded. The showcase also only displays items where you have at least one variant in stock. Finally, check What the showcase includes on the Filters & visibility tab—an item classified only with hidden values, such as a hidden designer, is left out of the showcase.
Can I show discontinued items that still have inventory?
Yes. In your Inventory showcase settings, turn on Include discontinued items to allow discontinued items with remaining stock to appear in the showcase. This is useful if you still have discontinued items available for purchase and want customers to be able to browse them.
Can clients keep browsing after booking?
Yes! Clients can continue to view the showcase and add favorites even after booking an appointment. Once they've booked a first-time appointment from the showcase—or opened it from their client portal—anything they favorite afterwards keeps flowing through to their profile, so you'll see their latest picks when they arrive.
A client says they favorited items, but I don't see any. What happened?
Almost always they browsed anonymously and haven't identified themselves yet, so the list is still sitting in their browser. Ask whether they booked their appointment through the showcase or opened it from their client portal—if neither, their favorites never had a profile to attach to. Sending them their client portal link and asking them to favorite from there is the reliable fix. It's also worth checking they aren't switching between your embedded showcase and your direct showcase link, or between devices, since each starts a separate list.
Updated on: 19/10/2026
Thank you!